Modern firearms are usually made to exacting standards. It doesn’t matter if it’s a Hi-Point or a Kimber, the modern manufacturing process usually takes out a lot of guesswork as to how a pistol should operate.
The most common fault with a concealed carry pistol will be a failure to fire. Supposed “accidental” (negligent) discharges, though oft cited in the news, are truly only common when someone is negligently using his or her firearm. This is usually operator error – not mechanical error.
So, for concealed carriers, the biggest obstacle is ensuring proper weapon operation. The mechanics of each gun have different tolerances and thresholds to things like carbon, dirt, mud, and humidity. Each has a better chance of properly discharging a round if it is kept lightly lubricated and clean.
When To Clean a Concealed Carry Weapon
- IF fired: directly afterwards.
- IF not fired: once a month should suffice.
A concealed carrier should be regularly practicing with the pistol he carries – and thus be cleaning it regularly. If, for instance, there is a back-up concealed carry pistol that hasn’t been getting a lot of use, then a monthly cleaning schedule is a safe bet to ensure proper operation.
Rule of thumb: Pick a day out of the month that you can commit to as a weapon cleaning day. All weapons that haven’t been out to the range can get properly maintained that day. That way – you’re always on top of routine weapon maintenance.
Basic Weapon Maintenance for Pistols
For this demonstration, we’re going to show the proper disassembly of a Sig Sauer P250. It’s an excellent example of a compact concealed carry pistol and, for instruction purposes – it should suffice.
Note: Your pistol will have a similar process. Check with your pistol’s manufacturer and follow their instructions for operator maintenance and cleaning.

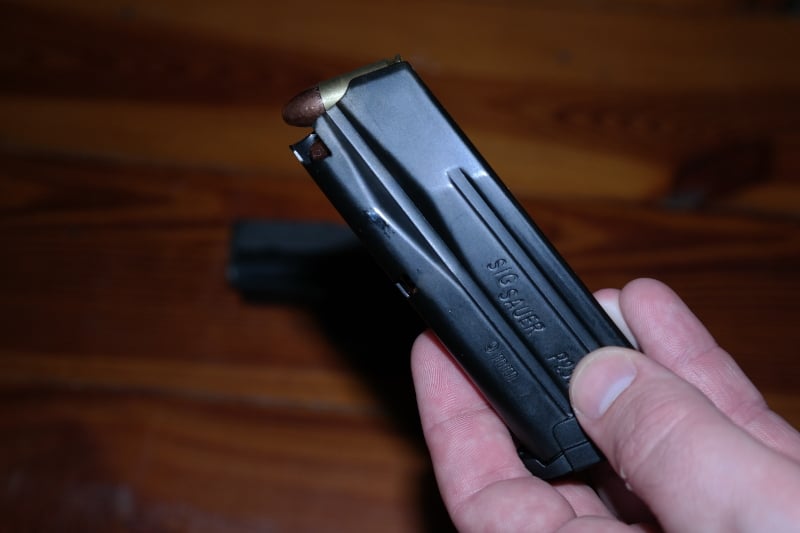
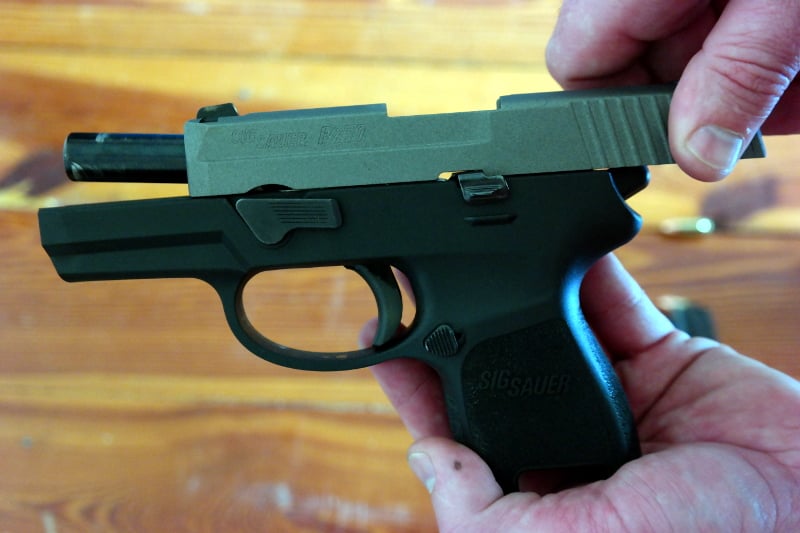
In a fully assembled and ready state, this is the Sig Sauer P250 (9mm). It presently has a full magazine (12 rounds) plus a round in the chamber.
Before it may be properly cleaned, it has to be disassembled to Sig Sauer’s manufacturing specifications. Below is what it should look like before it is cleaned.

Safely Unloading the Firearm
It cannot be stressed enough that one of the first safety rules for firearms is treat every weapon as if it were loaded. No matter if it’s a pistol that hasn’t been used for a month or the concealed carry pistol being brought out of your inside the waistband concealed carry holster – treat it as a loaded firearm and ensure it is unloaded prior to disassembly.
Note: During the unloading phase – always ensure the barrel is pointing in a safe direction.
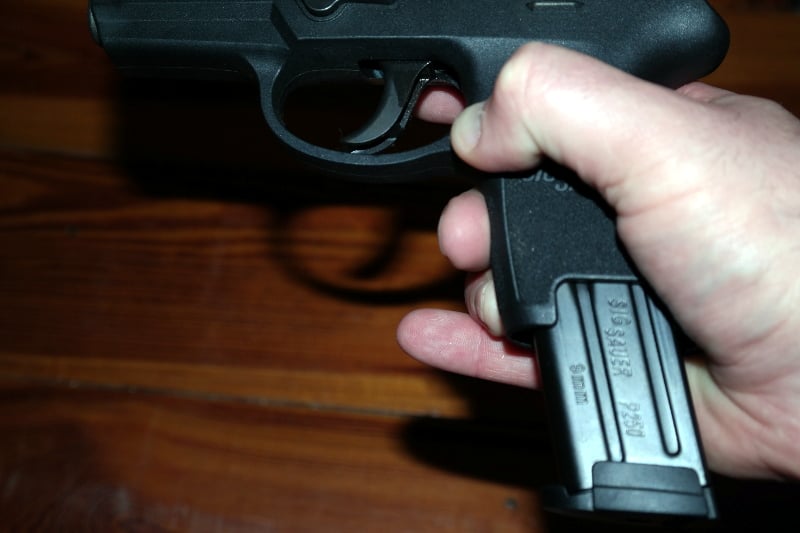
Eject the magazine by depressing the magazine release on the side of the pistol grip. The magazine should slide out on its own volition.
Finger outside of the trigger housing group, grip the serrated portion of the back end of the upper receiver and pull back until the slide is fully back. If a round is in the chamber, it should eject.
Once fully back, push up on the slide-lock to keep the upper receiver in this position.
Now that the upper receiver is locked in the rear position, manually inspect the barrel to ensure there is no round left in the chamber.
Once the barrel has been inspected and is free of ammunition – the weapon is now unloaded and ready for disassembly.
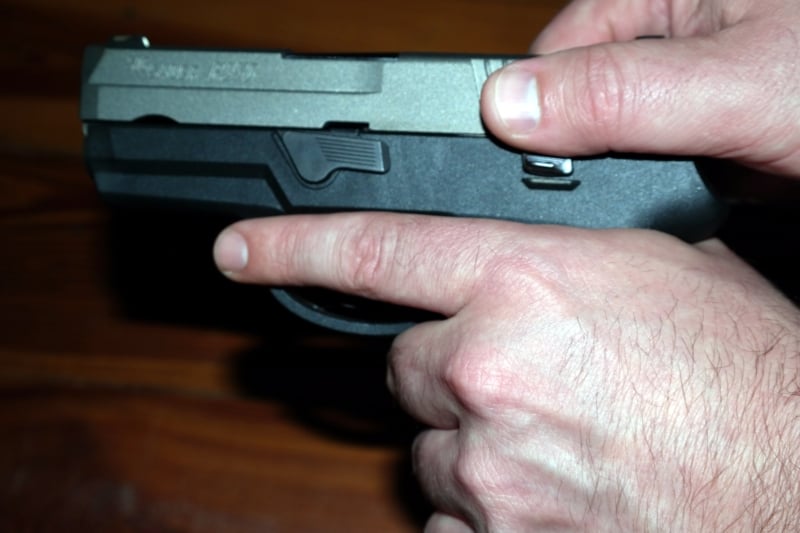
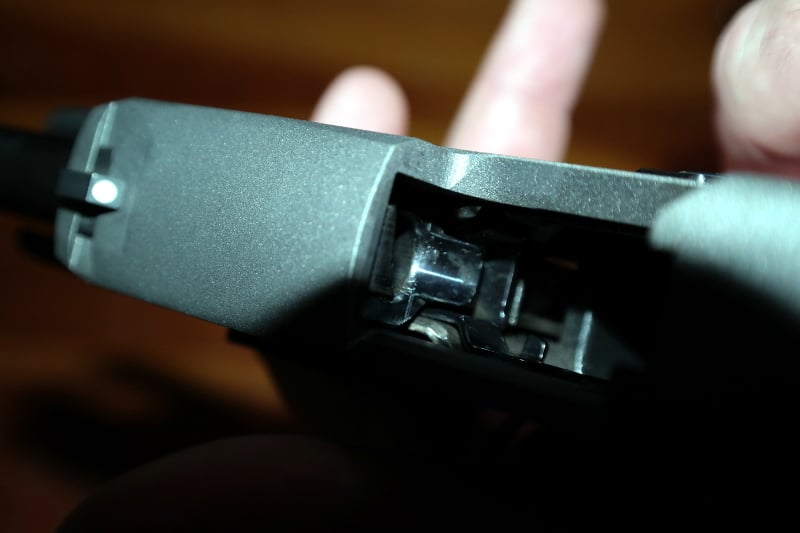
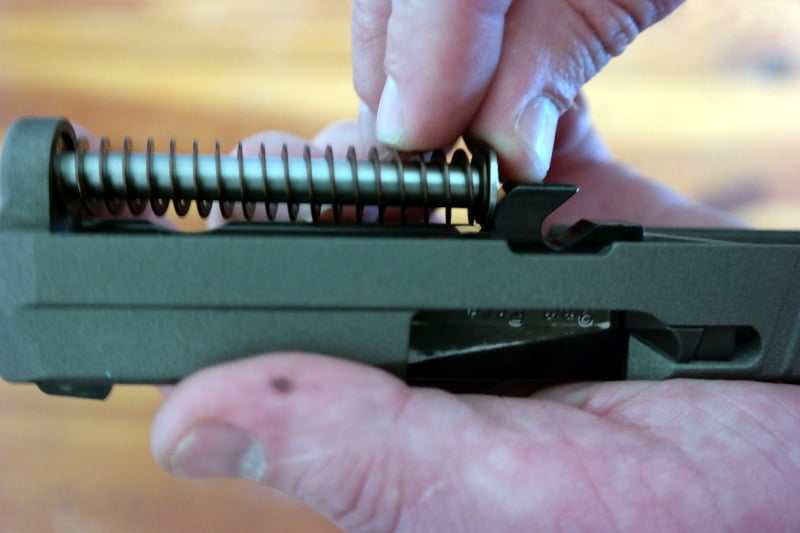
Rotate the upper receiver release lever, depicted in the image below.
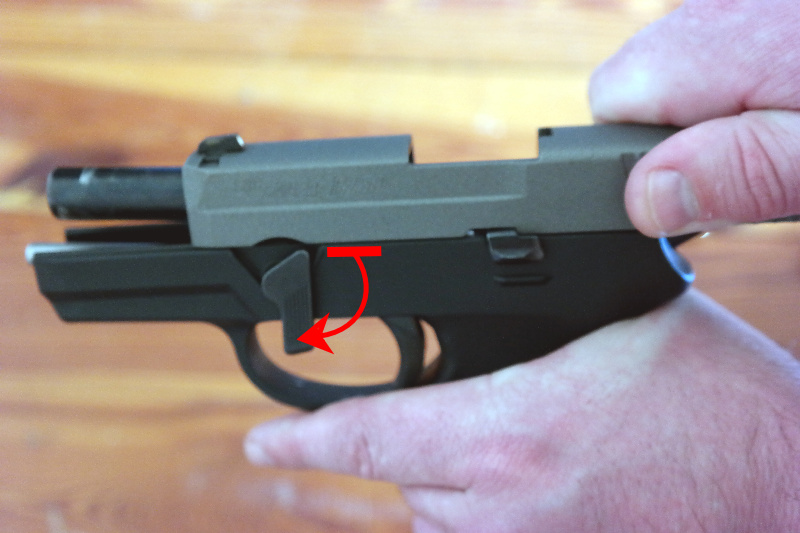
Now release the slide lock. This should allow the upper receiver to slide off smoothly from the lower receiver.
The lower receiver, at this point in time, is at the approved manufacturer’s state for operator-level weapon maintenance and cleaning. Put it down on the bench and direct your attention to just the upper receiver.
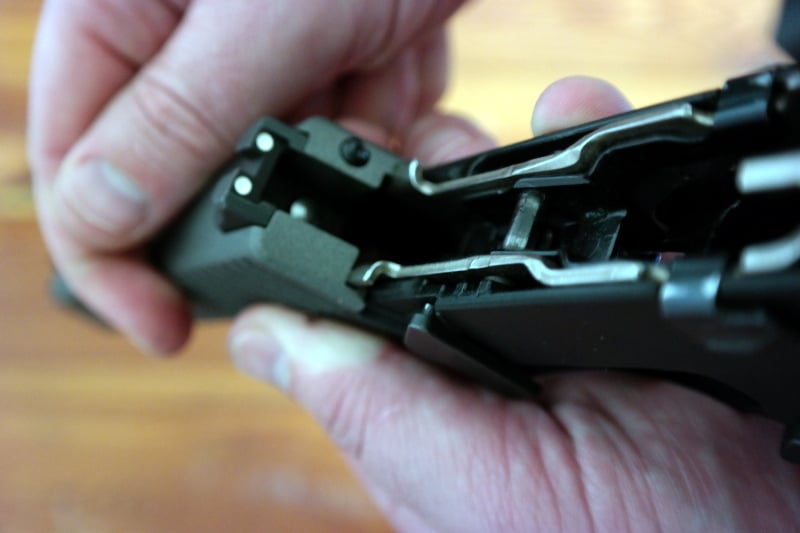
Flipping the upper receiver over, you should see a spring and pin assembly supporting a barrel in place. Gently push the pin forward just enough to release it from the grasp of the barrel.
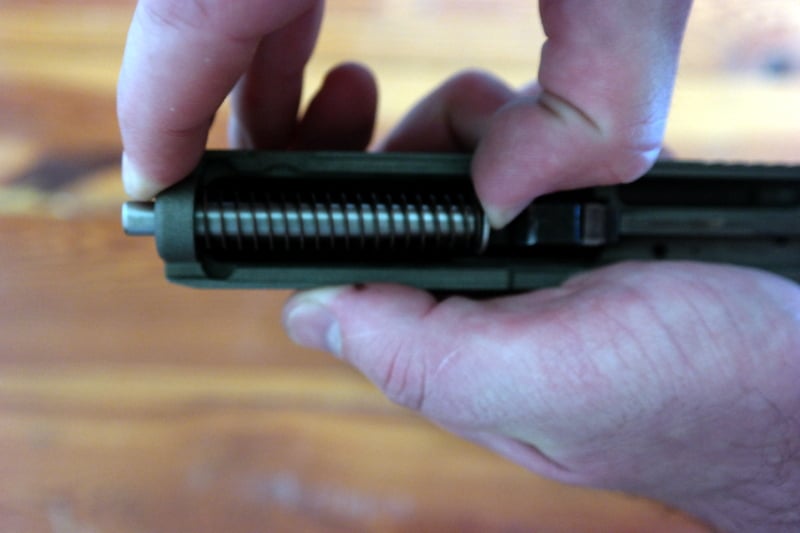
Cant the spring and pin just enough for it to clear the barrel’s threshold and remove it. For some pistols, the spring and pin is a single assembly. For the Sig Sauer P250, the pin can be removed from the spring for cleaning purposes.
The barrel can be removed in a similar fashion. Gently push it forward and then cant it back to remove it from the upper receiver.
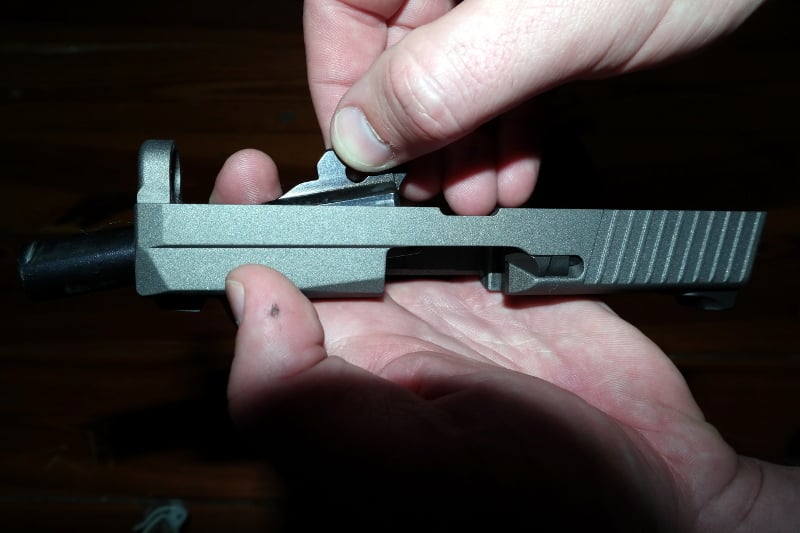
Once the barrel is removed – congratulations. For the Sig Sauer P250 and many similarly constructed compact pistols – you have reached the manufacturer’s specification.
Basic CCW Pistol Cleaning Procedures
Step 1: Unload
Always unload and clear all firearms prior to disassembly.
Step 2: Disassemble
A brief overview was covered in the previous section. Always check with the owner’s manual of your individual weapon to ensure proper form was followed.
Step 3: Inspect
Inspect all individually disassembled parts for:
- Carbon
- Corrosion (Rust)
- Foreign matter, debris (sand, dust, dirt, sticks, twigs, hair, etc.)
- Burrs, degradation of metal parts
Final note: It’s also a good idea to unload all magazines and take that opportunity to inspect the springs for carbon, dirt, grime, wear and tear.
Step 4: Clean
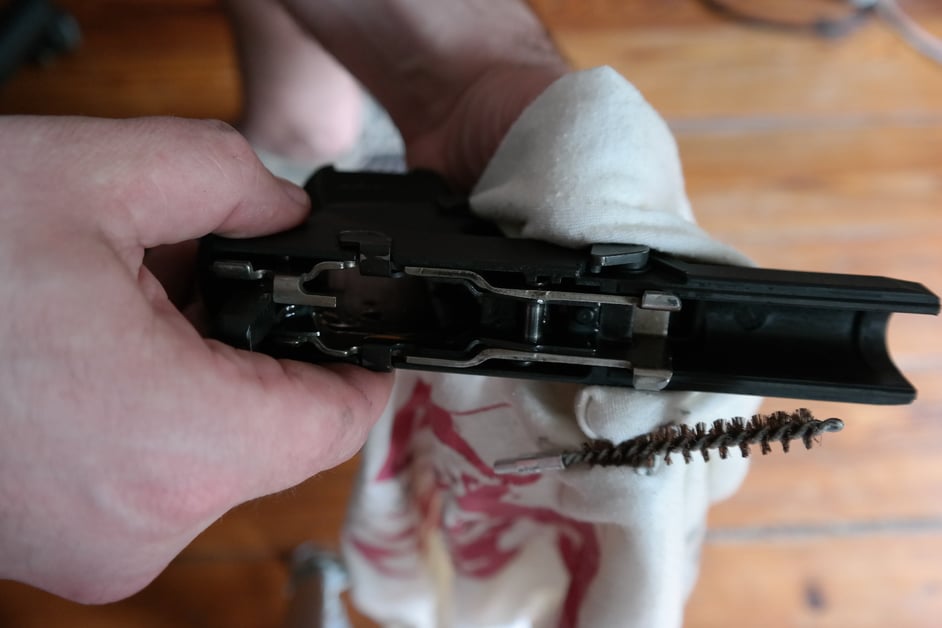
For most dirt and debris, a light cloth or cotton wipe may be sufficient. Caked on carbon deposits and rust can cause weapon malfunction. To remove them, use a light amount of manufacturer-approved weapon lubricant and either a bristle-tip brush and bore brush.
Scrape off the carbon and rust and clean with a cloth. Always inspect the primer and hammer to ensure they are able to move freely.
Clean until a white cloth can be run over and through any of the individual parts with little or no black residue remaining.
Step 5: Lubricate
Where metal parts meet, weapon lubricant is appreciated. It helps prevent corrosion, improves the function of a weapon, and maintains it longer. Heavy amounts is not necessary. A light coating of where metal meets metal, applied conservatively with a cloth, should be sufficient.
Step 6: Reassemble
Reverse the instructions above (or more preferably – your manufacturer’s given instructions) until you have an unloaded pistol in your hands.
Step 7: Function Check
Always check to ensure the pistol operates as it ought to. While it is unloaded, slide the receiver back and forth to see if it moves as smoothly as before. There shouldn’t be any sudden resistance where there was none before. Make sure your upper receiver’s slide lock is in place to keep the upper receiver from sliding back off. Check this by dry firing the weapon and visually inspecting the pistol.
Step 8: Reload
At this time, ensuring the weapon is facing a safe direction, it is appropriate to reload the firearm. Once the magazine clicks back into place in the magazine well of the pistol, it is again a loaded firearm and should be treated as such.
Hopefully, this tutorial was helpful for those beginners out there still getting used to regular weapon maintenance. Check back regularly to see this and other instructional tutorials on maintaining and using concealed carry handguns.


![[VIDEO] Kimber Micro 9 Review](https://imagedelivery.net/sbm_lYeJbALkepJgtmRD5w/concealednation.org/2017/07/Screenshot-2017-07-21-at-11.jpg/w=728,h=381)