The armed citizen community and industry has taken more serious notice of emergency medicine in recent years and for good reason. As it relates to saving a life, any American adult is more likely to do so with good medical training and gear than a firearm and firearm training.
The objective of today’s article is to provide a core baseline of knowledge to someone who is just beginning their journey in obtaining critical emergency medical skills and gear. At the very end of this article we will also provide some resources one might pursue to continue that journey.
A Trauma Kit – More Than Band-Aids
Most American adults have some amount of basic first aid training. Although it may have been years ago; you probably received some education on CPR, the Heimlich maneuver, and dealing with shock and heart attacks.
While all those skills are valuable there has generally been a lack of training on dealing with massive bleeding which is an critical part of an overall skill set and strategy relating to saving lives in a medical emergency.
Perhaps one of the reasons we see less emphasis on Stopping the Bleed, compared with techniques like CPR, is the relative need of some simple gear in order to be effective.
Most Americans have access to a basic first aid kit in their home, car, and workplace. That kit likely includes band-aids, Tylenol, and some triple antibiotic ointment. Non of those items are emergency items. First aid kits are designed to deal with small cuts, scrapes, and bruises.
A trauma kit is not a first aid kit. It is designed to deal with serious emergencies and to stabilize a casualty in the critical first minutes before they can be transported to a hospital.
While the vocabulary isn’t that important, meaning you can call your kit of life saving medical gear a Trauma Kit, a First-Aid Kit, an IFAK (individual first aid kit), or really whatever you want; the key is having the right gear and knowing what to do with it.
What Goes Into A Trauma Kit And How Do I Use It?
What follows is an overview of critical components that make up a trauma kit and a brief overview of when to use that item and how to use that item.
Also toward the end of this article we will reference a few pre-built kits you can purchase that will include all these components and will cost less than purchasing the individual components independently.
Tourniquets
A tourniquet is a tool designed to cut off blood flow from an extremity such as an arm or leg. If the injured party has a arterial bleed and risks bleeding to death a tourniquet can stop the blood loss and save the life.
Tourniquet research and best practices have changed dramatically since you were a boy scout. Today we know applying a tourniquet has less inherent risk than previously thought. Due to advances in medicine tourniquets can be left on a limb for up to 2 hours without much risk to tissue damage that could lead to amputation.
In short: If the injured party has serious bleeding from an arm or a leg put a tourniquet on it to stop the bleeding.
Different tourniquets are applied differently but none of them are complex or difficult. Notable and trusted tourniquets include: The Combat Application Tourniquet (CAT) from North American Rescue, The SOF-T from Tactical Medical Solutions, The SWAT-T from H&H Medical, and The Tactical Mechanical Tourniquet (TMT) from Combat Medical. The CAT, SOF-T, and TMT listed above are among a short list of tourniquets approved by the TCCC committee for use by the US Military.
To apply the tourniquet, tighten it down per the manufacturer instructions 2-4 inches above the injury on the leg or arm. If unsure where the injury is, apply the tourniquet “high and tight” on that limb.
Chest Seals

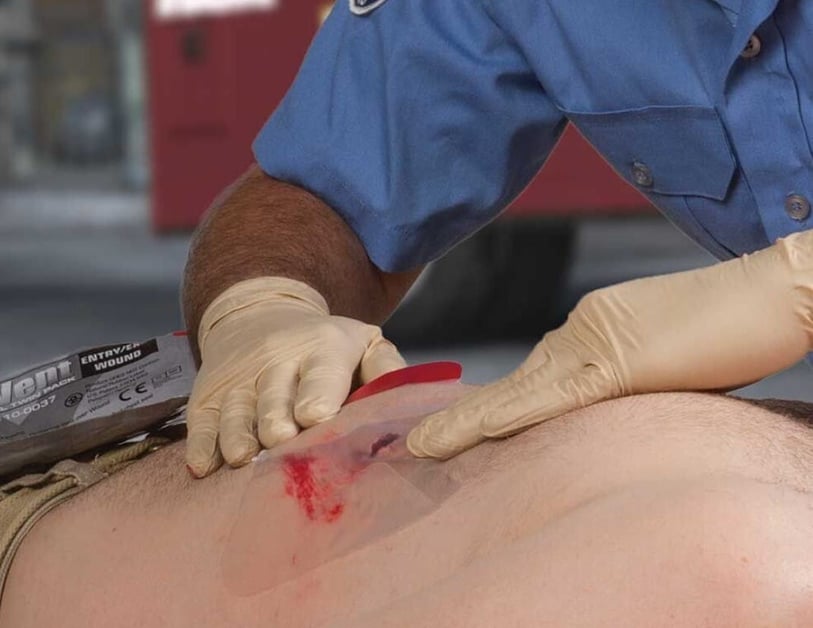
A chest seal is an occlusive dressing designed to be applied to penetrating wounds in the chest cavity. A gun shot wound or other penetrating injury opens up the chest cavity and as the injured party breathes air enters the chest cavity and has a hard time escaping.
This build up of air in the chest cavity applies pressure against the lungs and heart making it difficult for the injured party to breath and for the heart to pump blood. This is often referred to as tension pneumothorax or a sucking chest wound.
A chest seal is basically a sticky piece of rubber that is applied over the wound and prevents air from entering the chest cavity. We generally recommend “vented” chest seals as they allow the escape of air from the chest cavity in addition to blocking air from entering the cavity.
There are competing chest seals in the market. Notable and trusted chest seals include: The Hyfin Chest Seals from North American Rescue, H*Vent Chest Seals from H&H Medical, and The Russell Chest Seal from Safeguard. We recommend always stocking your kit with at least 2 (they are often sold in twin packs by default) so you can apply the seal to both an entrance and exit wound.
Chest seals are applied by moving an adhesive backing from the seal, cleaning off the application area of debris and blood as best as able, and applying (sticking) the chest seal directly over the wound.
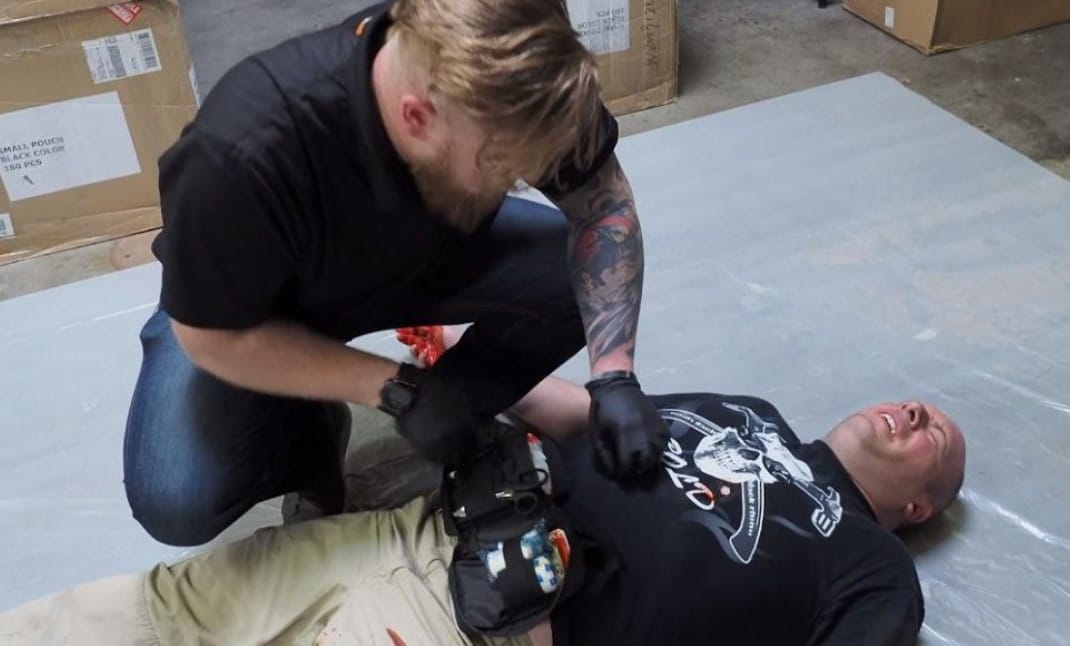
Hemostatic Impregnated Gauze
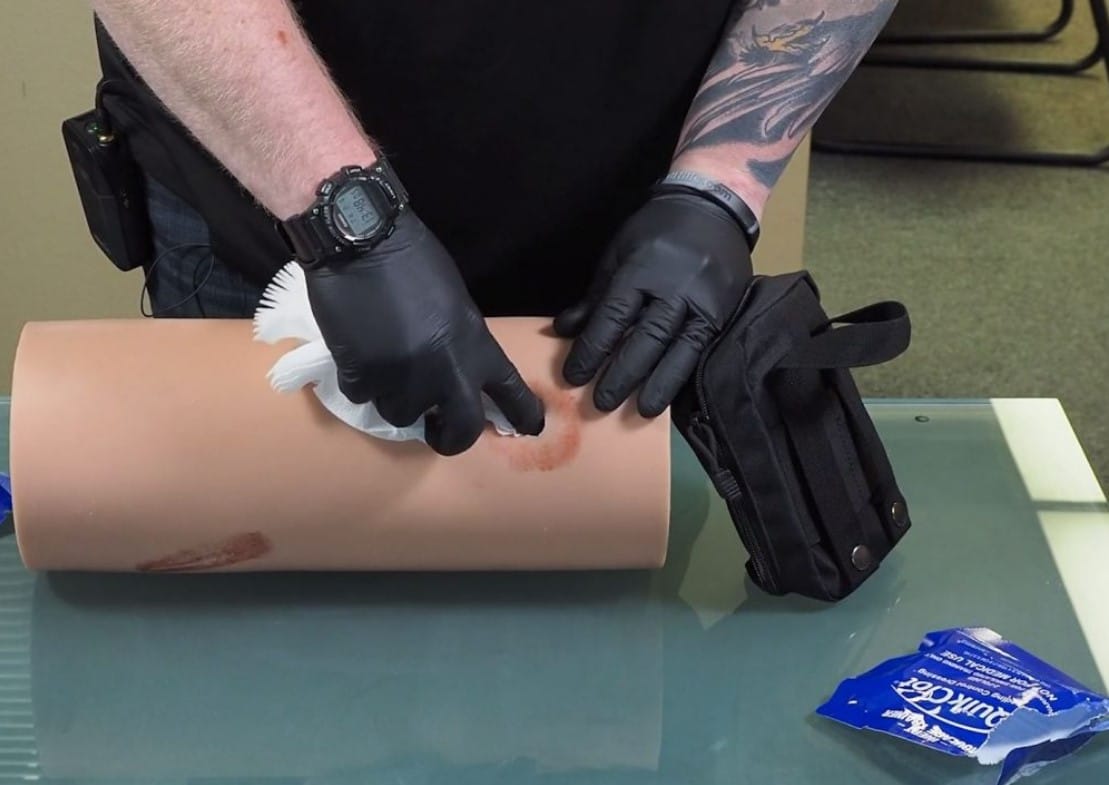
A tourniquet is the best way to stop bleeding on an arm or leg and a chest seal is the best thing to apply to a chest penetrating injury but what do you do about a major bleed in a junctional area? You pack the wound with a hemostatic impregnated gauze.
When the injured party is bleeding heavily in the neck, the groin, or the armpit you can’t apply a tourniquet but you need to stop the bleeding. That is done by packing the wound with gauze. That effort will be more effective if you use a gauze that is impregnated with a hemostatic agent.
Hemostatic agents are things that are known to cause the blood to clot faster or coagulate. So while packing any gauze into the wound is a good idea, your efforts will be more successful when using a gauze or bandage that has a hemostatic agent in it.
Notable brands of Hemostatic Gauze include: QuikClot by Z-Medica, ChitoGauze by Hemcon, and Celox. Each of those 3 companies have a version of that product that is available for civilian use.
We recommend watching this video to learn the proper process for packing a wound.
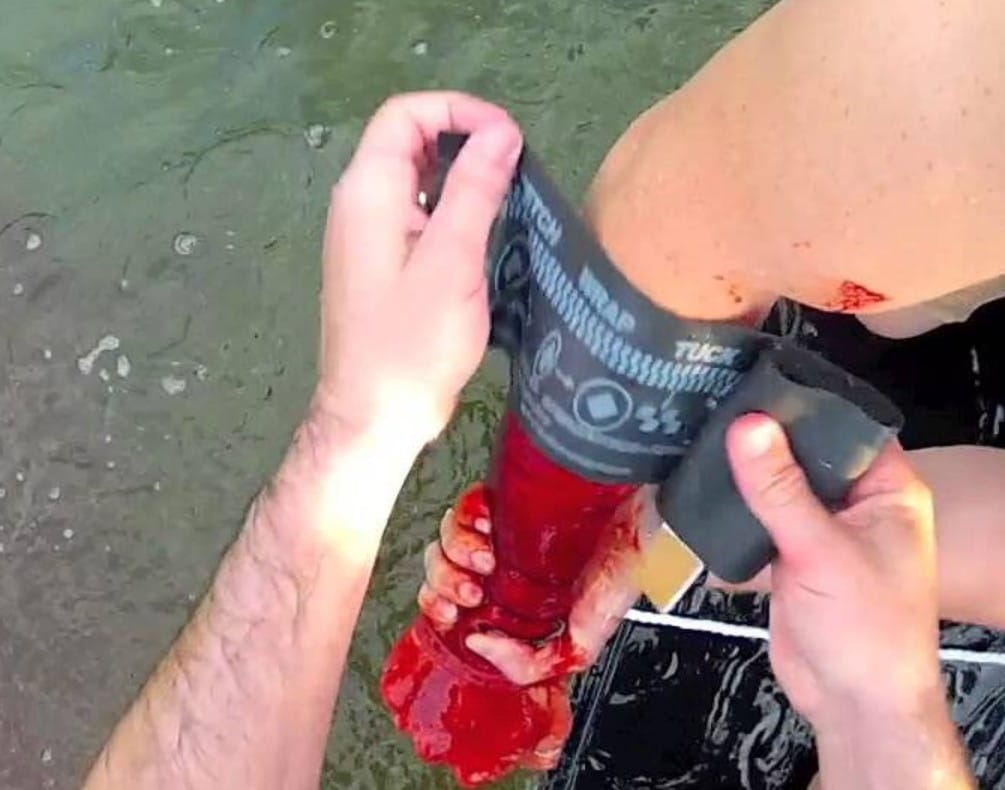
Pressure Bandage
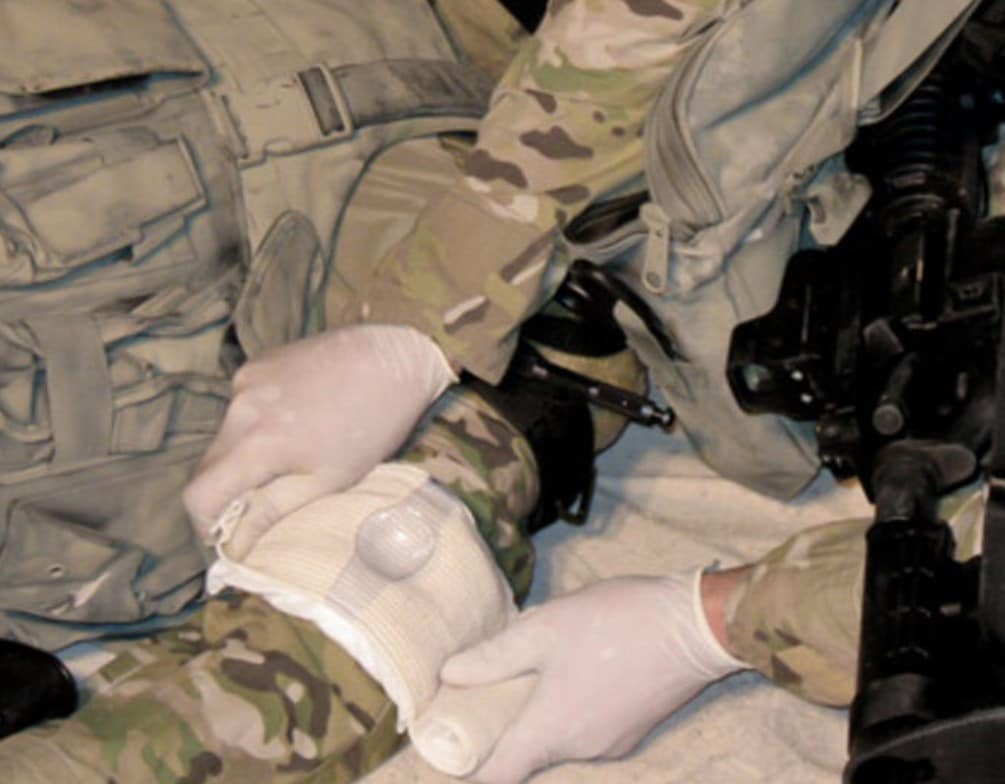
A pressure bandage is a style of bandage designed to apply pressure to the wound to assist in the stopping of blood loss. Consider that traditionally you may have been taught to apply a bandage and then apply direct pressure to that bandage. However, if you need to move on to helping the next person, patching up another injury, or freeing up your hands to dial 9-1-1 it will be helpful to use a bandage that is designed to apply pressure without direct contact or assistance from your hands.
A pressure bandage is great for any situation where the blood loss maybe doesn’t justify a tourniquet. A pressure bandage can also be used in conjunction with wound packing. Just applying some good direct pressure may be all the is required to keep the injured party stable and free up your hands to continue to help in other ways.
A common style of pressure bandage is the “Israeli Bandage” which has some brand recognition but there are other designs and styles that have shown to be just as effective.
Notable pressure bandages include: The Emergency Trauma Dressing (ETD) by North American Rescue, The OLAES Modular Pressure Bandage from Tactical Medical Solutions, The Thin H Bandage from H&H Medical, or a traditional Israeli style bandage.
Each is applied slightly differently so be sure to seek training and follow the manufacturer’s instructions.
Nasopharyngeal Airway (NPA)
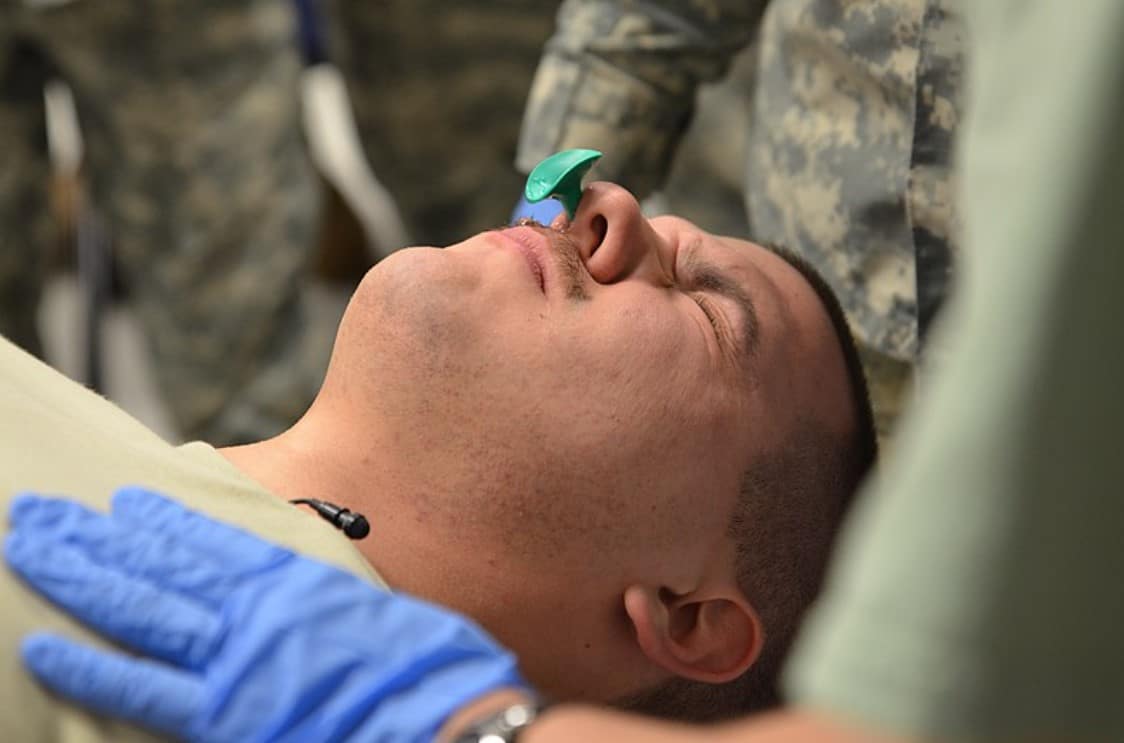
A NPA is an adjunct for securing an airway. When the injured party has suffered trauma to the face or is unable to protect their own airway because of an altered mental status a NPA may be a great asset. The NPA is applied through the nasal passage to attempt to open up a channel for air to pass through.
NPAs can be applied both to a conscious and unconscious patient and can be the difference in keeping that person’s airway open.
There are a lot of credible NPA products on the market but we strongly recommend a pre-lubricated NPA as it saves significant time in applying the tool to the injured party. There is only one Pre-lubricated NPA on the market and it is from Safeguard Medical.
To use a NPA remove it from package and apply a water soluble jelly (lubricant) generously along the NPA if it isn’t already pre-lubricated. Insert it gently through the nose. If the casualty gags and/or screams and pulls out the NPA when you try to insert it, they probably don’t need it.
And Much More
There are many other important components of a good Trauma Kit. For example, you keep yourself and your patient safe when you have nitrile gloves you can wear when rendering aid and by having a pair of trauma shears to use to remove clothing to expose an injury in order to treat it.
You might also consider a Mylar rescue blanket for treating hypothermia, an elastic bandage, and some additional gauze. A marker is helpful to record the time of a tourniquet application or take other notes that can be passed on to responding EMS professionals.
The Plethora of Free To Low Cost Training Available To You
This article is meant to serve as a thorough introduction to emergency medical response but of course being really prepared means getting quality training.
Luckily there are some fantastic resources designed to help you get a solid introductory education on how to apply and use these products in an emergency. Here are two no-cost considerations:
Emergency Trauma Response (Free – Online Video)
Our friends at Mountain Man Medical have filmed a simple but high quality training course called Emergency Trauma Response. It is 100% free and can be completed at their website. You do need to setup a free user account but no credit card or payment is needed to complete the full course. Click here to get started.
Stop The Bleed (Free – In Person)
“Stop the Bleed” is a campaign administered by the ACS Committee on Trauma. It was initiated by the National Security Council Staff, The White House. The program provides certifies medical professionals to teach a uniform “Stop The Bleed” curriculum.
Certified instructors provide the class in person all across the country for little to no cost. The whole class runs no more than 90 minutes. Click here to search for a class near you.
Purchasing A Kit
After conducting some research into the most affordable way to get name-brand quality components we recommend you consider Mountain Man Medical kits. The Yellowstone, which is $90 to $112 depending on if you add the optional additional tourniquet, is stocked with all name brand proven components.
What we cannot recommend, is any trauma kit or component sold on Amazon. Amazon is full of kits stocked with counterfeit knock-off products that are marketed as the genuine item but are in fact sub-par products imported from foreign countries. Our research found that even when the product description suggests you will receive the real thing; it often arrives with fake substitutes.
For those of you who have already received training what do you feel we missed in this crash course article? Let us know in the comments below!
![[VIDEO] If You Don’t Have A Gun, Use Whatever Is At Your Disposal… Including A Lottery Machine](https://imagedelivery.net/sbm_lYeJbALkepJgtmRD5w/concealednation.org/2019/01/ScreenHunter_1861-Jan.-04-14.06.jpg/w=728,h=381)

![[FIREARM REVIEW] Bersa TPR9](https://imagedelivery.net/sbm_lYeJbALkepJgtmRD5w/concealednation.org/2020/04/bersa-tpr9-02.jpg/w=728,h=381)

![[VIDEO] How To Provoke A Shooting](https://imagedelivery.net/sbm_lYeJbALkepJgtmRD5w/concealednation.org/2015/02/RiteAidPepperSpray.jpg/w=728,h=381)